We’re pleased to announce that a new Quick Assign view has been created for Dovico Timesheet that allows you to assign or unassign employees across projects quickly!
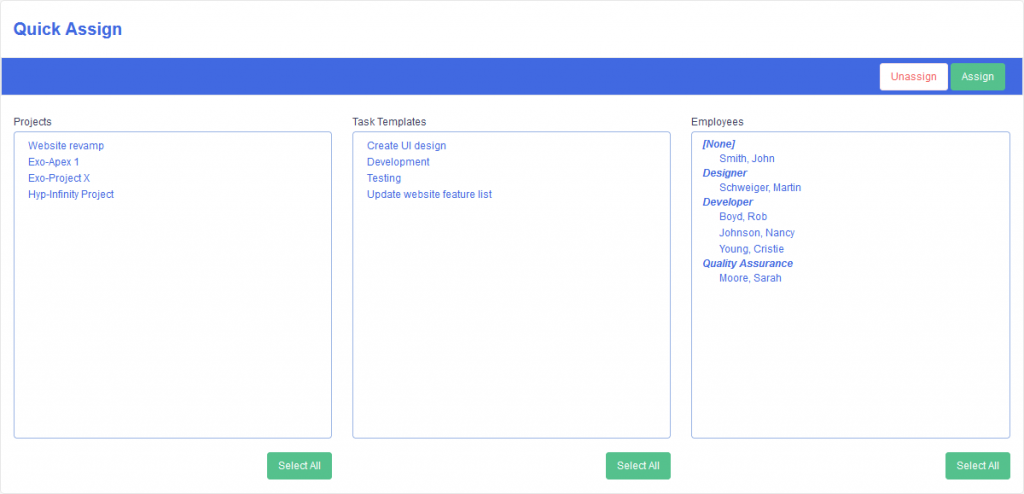
The new Quick Assign view is made possible thanks to a feature we released earlier this year, where tasks can now remain linked to a task template. If you’d like to learn more about that feature, the following article walks you through how it works: https://timesheet.dovico.com/blog/2023/05/09/dovico-timesheet-updates-for-may-2023/
This article covers:
- Creating tasks for the selected projects from the selected task templates
- Assigning employees to tasks that are linked to the selected task templates
- Unassigning employees from tasks that are linked to the selected task templates
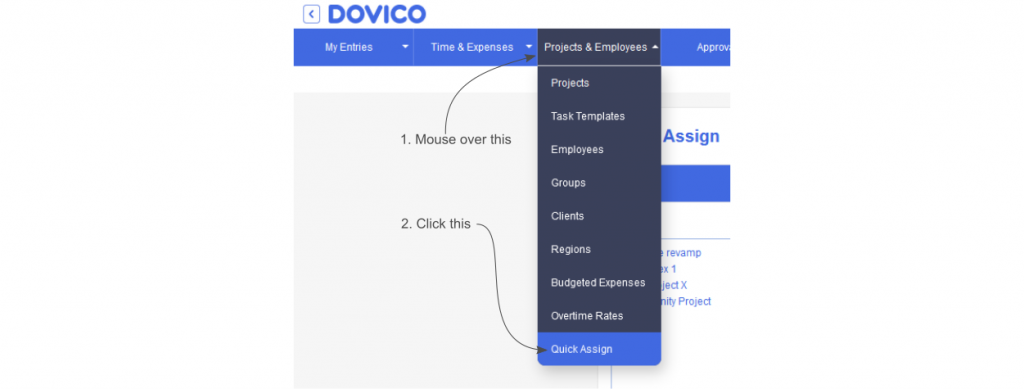
If you’re a Professional or Premium customer, you can access this view via the Projects & Employees menu item as shown in the following image.
If you’ve used the previous version of Timesheet, you may be familiar with the Quick Assign view that was there. There are similarities with how this new view works but also some differences that I’ll explain.
With this view, there are two approaches that you can use when setting up your projects:
- Create just the tasks for the project and assign the employees at a later date. This can be useful if you know that a project will be needed but you haven’t yet determined who will work on it.
- Or, you can create the tasks and assign the employees all at once.
Let’s take a look at the first approach and create only the tasks on the projects.
Creating tasks for the selected projects
If you only want tasks created for the selected projects, you can do that by not selecting any employees in the Employees list and then pressing the Assign button as shown in the following image.
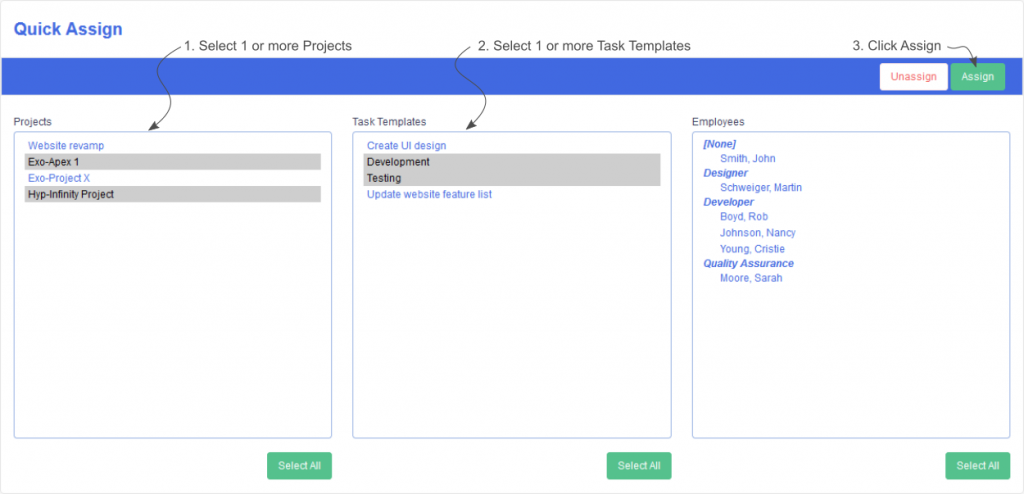
For each selected project, a task will be created if the project doesn’t yet have a task linked to the selected task template.
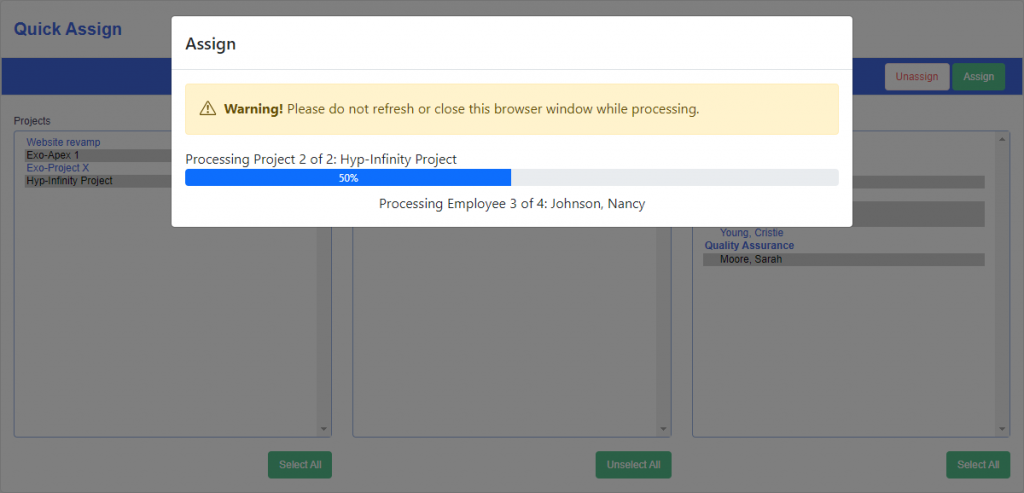
As shown in the following image, a processing dialog will be displayed when you do an assignment or unassignment to let you know how things are progressing. Your employees will still be able to log in and continue using the software while the processing is happening but, because it’s possible to select a large number of items, this could take some time and you won’t be able to use this employee while the tasks are proceeding.
The next thing that we’ll look at is assigning employees to tasks.
Assigning employees to the tasks that are linked to the selected task templates
For this step, choose which projects and task templates that you want the selected employees to be assigned to. Then, press the Assign button as shown in the following image.
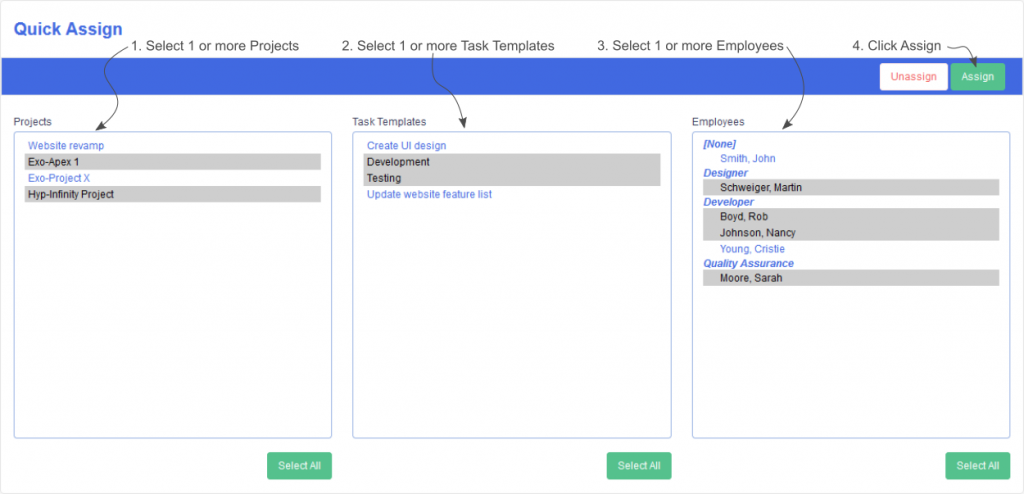
Because a project can have multiple tasks linked to the same task template, the selected employee will be assigned to all tasks linked to the selected task template of the selected project.
When assigning employees, if a project doesn’t yet have a task linked to the selected task template, the task will be created before the employees are assigned to it.
Being able to add tasks and employees to a project is great but there are times when someone may need to be removed from a task so let’s take a look at how that’s accomplished with this view.
Unassigning employees from tasks that are linked to the selected task templates
To unassign employees from a task, select the project and task template you wish to modify, select the employee you want to unassign, and then press the Unassign button as shown in the following image.
WARNING: Because a project can have multiple tasks linked to the same task template, the selected employee will be unassigned from all tasks that are linked to the selected task template of the selected project.
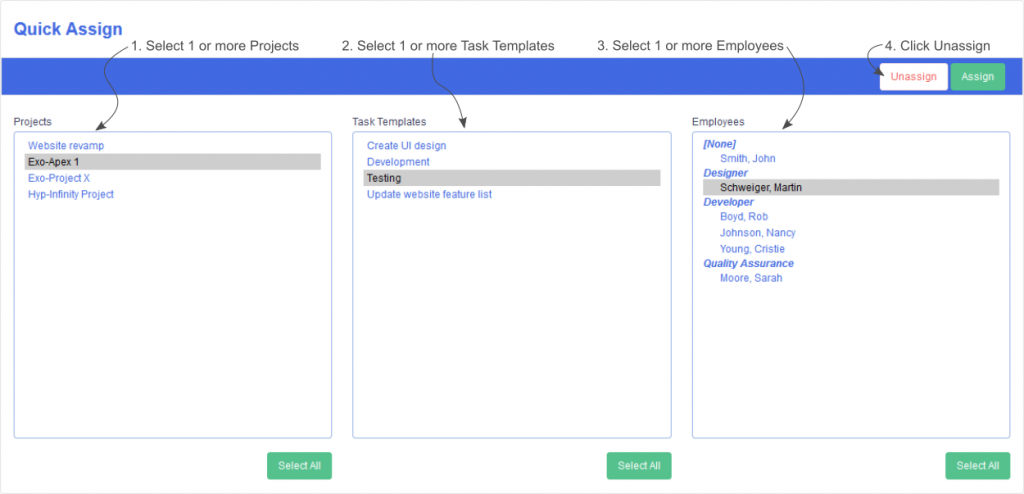
If you have used the Quick Assign view in the earlier version of Timesheet, the process of unassigning tasks in the current version is different. Tasks cannot be unassigned in this view. In this view, when doing an unassign, you must always select at least one employee.
If you need to remove a task from a project, you need to edit the project in the Projects view and delete the task there.
Just a warning though, that deleting tasks will also delete any time entries associated with them.
Conclusion
It’s my hope that this new Dovico Timesheet Quick Assign view will help make managing your projects easier. As always, please let us know if you have any feedback or suggestions for improvement.
If you’re not yet using Timesheet, check out our pricing page where you can sign up for a free 30-day trial to see if Timesheet is right for you: https://www.dovico.com/pricing
Gerard Gallant,
CIO of Dovico Software
Stay informed!
For more information on how and when regular maintenance is performed on Dovico servers, please check out our Maintenance Window Policy.
Please let us know if you are experiencing any issues with our software or have suggestions about how we can improve your experience by contacting our friendly support team.
Please reach out with any questions or feedback!